
Hello Friends!!
This blog tells you about how you can configure Jenkins with Mailgun. You all must be wondering how you can integrate Jenkins with Mailgun. Few days ago, even I was one among you all. Now that I have figured out how it can be done, I thought of sharing this piece of knowledge with you all. This is how we all can learn together and grow. Now stop wondering and start reading!!

In short, this can be done by installing Email Extension Template Plugin and configuring it properly. To simply it for you, I have broken them down into steps below.
Prerequisites:
Basic knowledge about creating jobs and configuring those jobs in Jenkins
Step 1 :
Open Jenkins URL (example: http://localhost:8080/) on any browser.
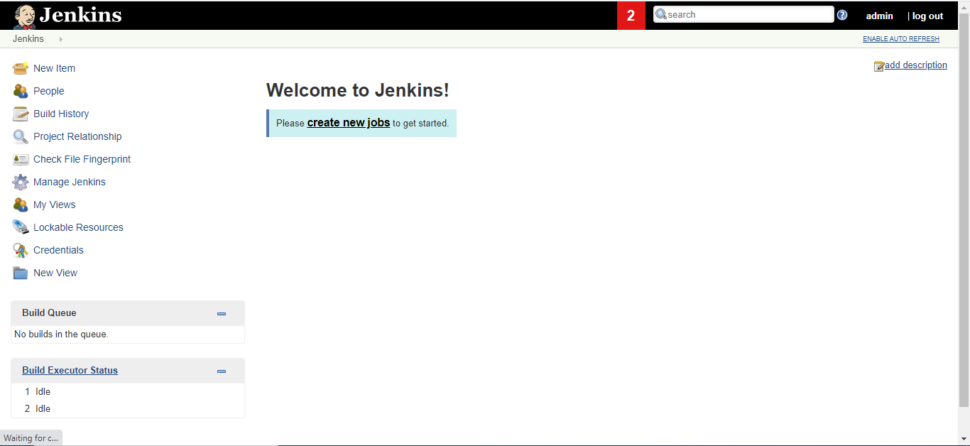
Step 2 :
Create a free style project set all the known configurations.
Click on ‘Manage Jenkins’ in the menu that appears on the left side of the screen.

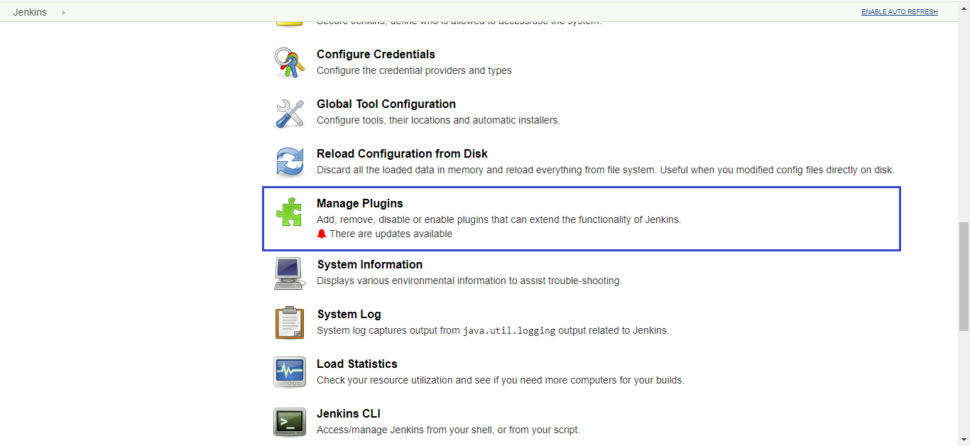
Step 3 :
In the ‘Manage Jenkins’ page, scroll down and click on ‘Manage Plugins’.
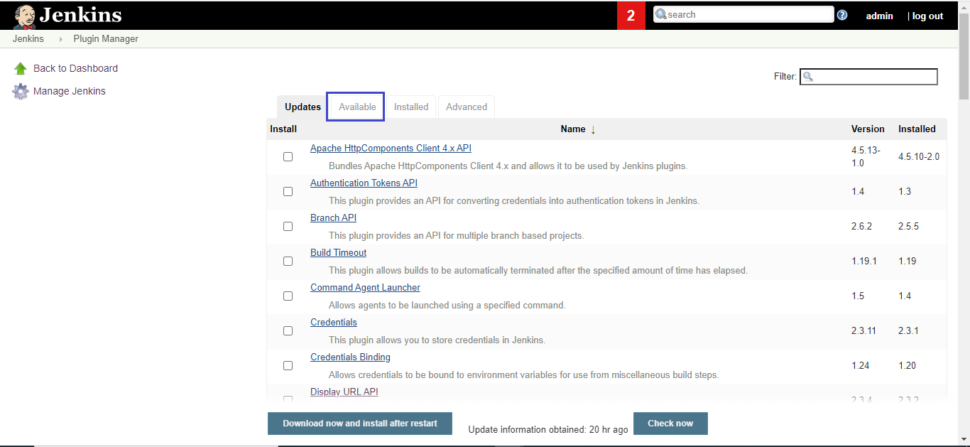
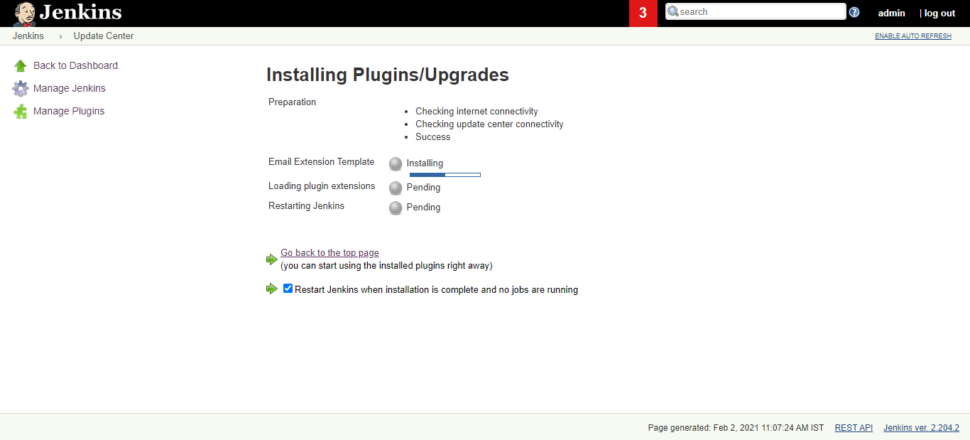
Step 4 :
Go to the Available Tab and search for ’email’ in the filter. Install Email Extension Template Plugin. For installing, click on the checkbox next to of the plugin and click on ‘Install without restart’ button.

Step 5 :
Go back to Manage Jenkins page and now click on Configure System.
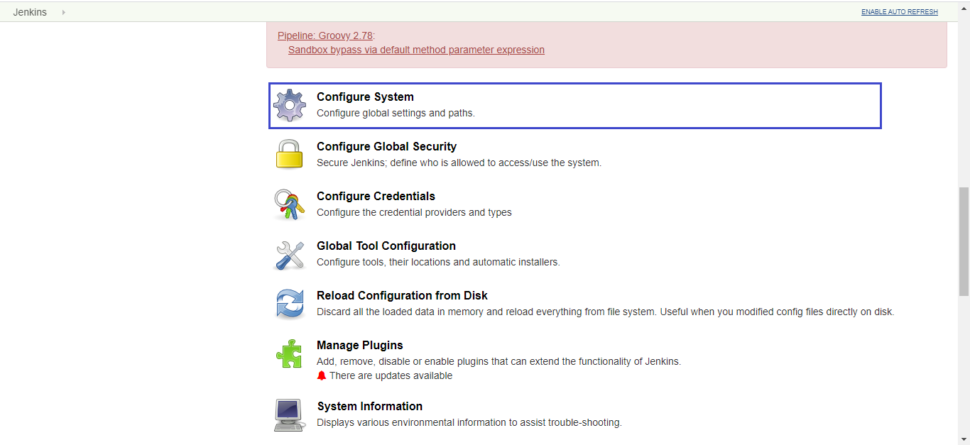
Step 6 :
For default email notifications :
Scroll down to ‘Email-Notification‘ section. Click on ‘Advanced’ and set the mailgun credentials.
SMTP Server : smtp.mailgun.org
Use SMTP Authentication : checked
User Name (smtp user name) : postmaster@<YOUR-SMTP-DOMAIN>
Password (smtp password) : *********
Use SSL : unchecked
Use TLS : checked
SMTP Port : 587
Charset : UTF-8

Apply the changes and then the configuration can be tested, but the test email would come from nobody@nowhere, which means that the sender’s address has not been configured.
Now, to configure the sender’s address, scroll up to ‘Jenkins Location‘ section. Set the ‘System Admin address’ to <YOUR-NAME>@<YOUR-DOMAIN>
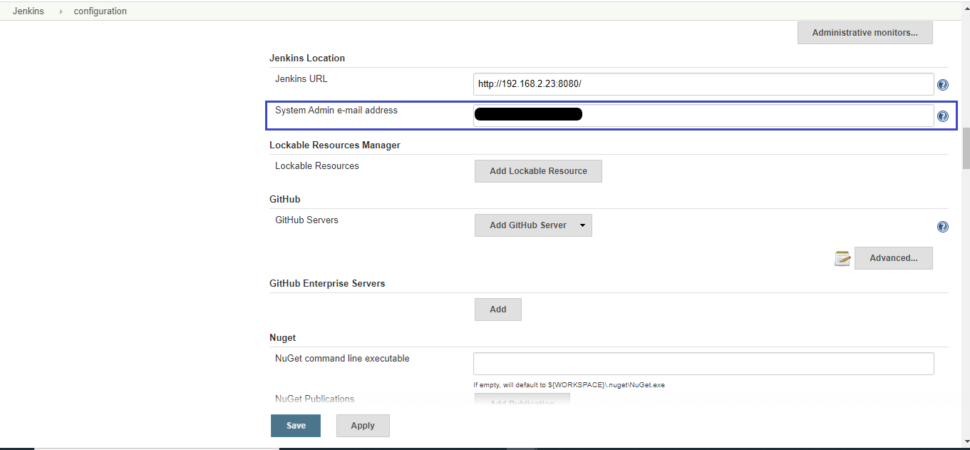
Apply and Save the changes made.
For custom email notification :
Go to Manage Jenkins -> Configure System
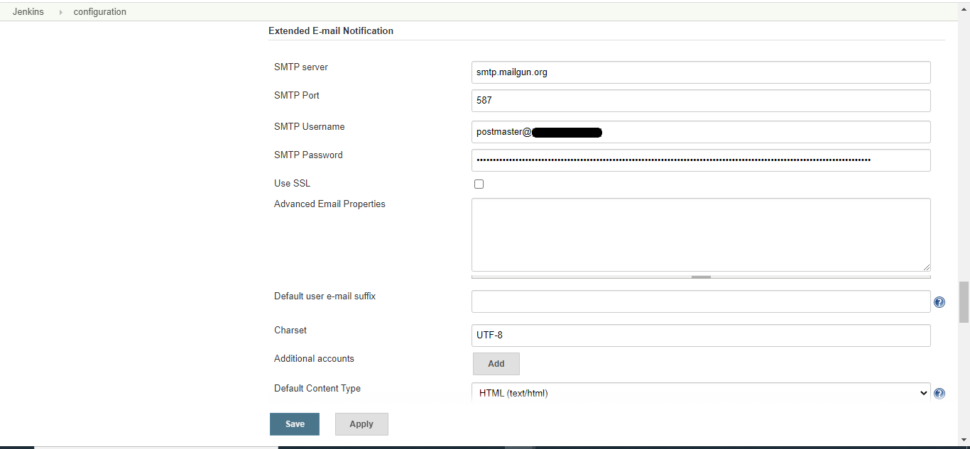
Scroll down to ‘Extended E-mail Notification‘ section. Click on ‘Advanced’ below ‘SMTP Port’ and ‘Advanced’ below ‘Default user e-mail suffix’ and set the following
SMTP Server : smtp.mailgun.org
User Name (smtp user name) : postmaster@<YOUR-SMTP-DOMAIN>
Password (smtp password) : ********
Use SSL : unchecked
SMTP Port : 587
Charset : UTF-8
The rest of the options are quite obvious and can be set as per the requirement.
Apply and Save the changes made.
The sender’s address for custom email notifications is configured in the job.
Step 7 :
For default email notifications :
Go to your job and click on ‘Configure’ in the menu that appears on the left.
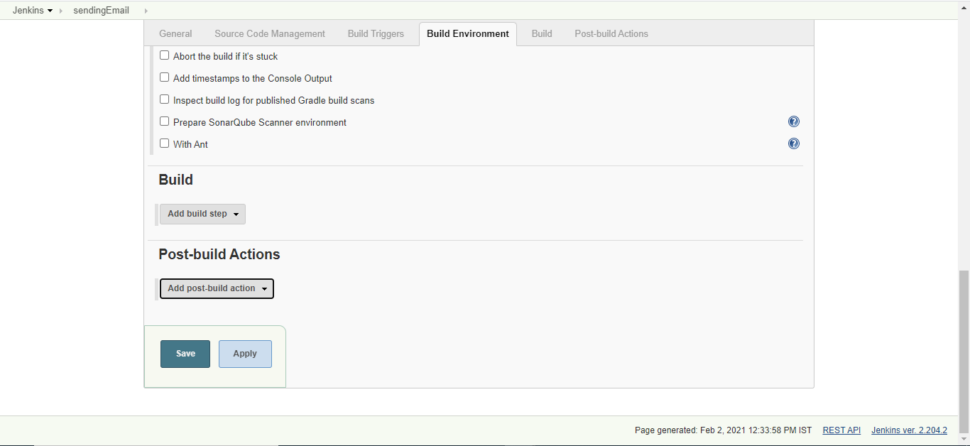
Scroll down to ‘Post-build Actions‘ and click on ‘Add post-build action’. Select ‘E-mail Notification’ in the menu.

Add the email addresses of the recipients. The addresses have to be comma separated.
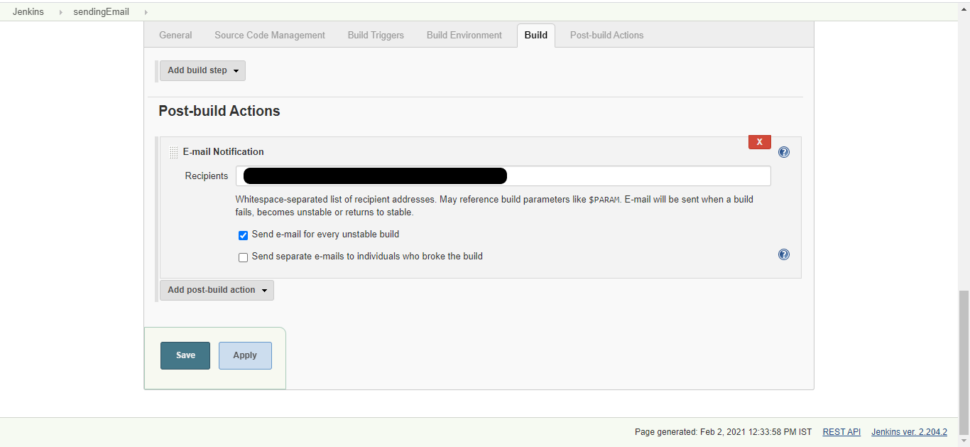
Apply and Save the changes and then build the job to receive email notifications.
For custom email notification :
In the ‘Post-build Actions‘, add ‘Editable e-mail notification’.

Here, set the ‘Project from’ to the sender’s email address, <YOUR-NAME>@<YOUR-DOMAIN>

Remaining options are obvious. Pre-send Script, Post-send Script, various triggers etc. can be added using the advanced settings.
Play with it and learn!!
Apply and Save the changes and build the job to get custom email notifications.
That’s it friends!!
I have shared what worked for me.
Come back and do tell me what you feel!!
February 11, 2021Nice one & useful.
Thanks for sharing
February 14, 2021I found this blog very informative. It explains in detail all the steps required to configure Jenkins with Mailgun. I suggest you all to have a look at it.
February 15, 2021Extremely helpful! Thanks!
February 15, 2021Very useful information.
February 15, 2021Very useful
February 15, 2021very useful stuff
thnk u