

Encrypted Snapshot
AWS Snapshots provides a solution for securing storage data in EBS volumes, boot volumes. It copies the data present in the volumes which can be used for data recovery, data migration across regions and accounts.
Benefits of AWS Snapshots:
Cost Efficient
Secure
High Availability
AWS Snapshots are created when we take an AMI of an EC2 instance. To protect the data present in snapshots, we encrypt the snapshots with an encryption key. Sometimes we need to move the snapshots to another AWS account. To move, the snapshots, we require following steps:
Step 1 – Create a customer-managed key in KMS. (it will be scheduled-on deletion in between 7 – 30 days)

Step 2 – Create an IAM policy in the source account and attach it to user.
“Version”: “2012-10-17”,
“Statement”: [
{
“Effect”: “Allow”,
“Action”: [
“ec2: ModifyImageAttribute”,
],
“Resource”: [
“arn:aws:ec2:region::image/AMI-ID“
]
}
]
}
Step 3 – Copy the snapshot with the new key created and create the snapshot.
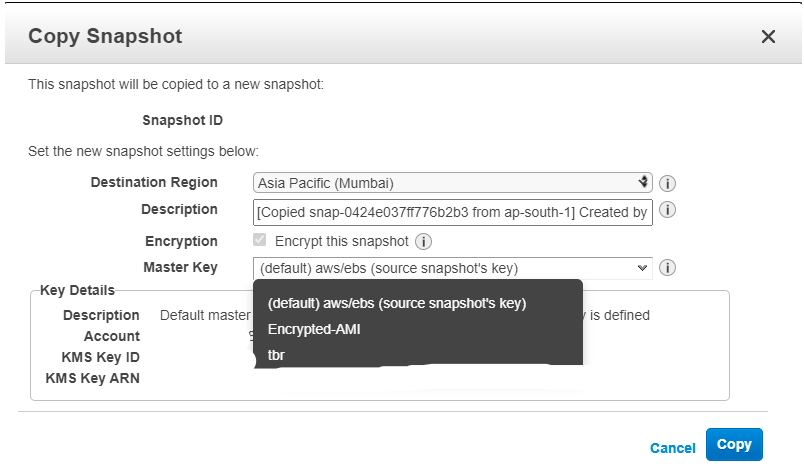
In this step, a new snapshot will be created with the new key.
Step 4 – Give permission to the target account in the Customer managed key created.
Click on key ID and add the Target account ID.

After adding Target Account ID

At the end of the page, you will find this property. Add the target account ID.
Step 5 – Create an IAM policy in the Target account to grant the permission and add it to the user.
{
“Version”: “2012-10-17”,
“Statement”: [
{
“Effect”: “Allow”,
“Action”: [
“kms:DescribeKey”,
“kms:ReEncrypt*”,
“kms:CreateGrant”,
“kms:Decrypt”
],
“Resource”: [
“arn:aws:kms:us-east-1:<targetaccountID>:key/<newkeycreated>”
]
}
]
}
Step 6 – After giving permission to the target account, It will be visible in the same region of the Target account in the Private Snapshot section.
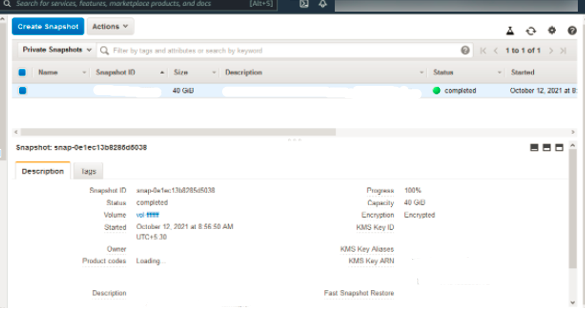
Step 7 – After the above step, we can create a volume or image from the same.