
Hi Folks! In this blog, we will learn how to create a custom HiveMQ extension with Maven.
Prerequisite
- Eclipse IDE for Java Developers
- HiveMQ Broker
Open Eclipse and go to File > New > Project > Maven and select Maven Project, then Next.
Select your Eclipse Workspace and select Next >
After clicking on Next, the New Maven Project dialog will come and select Add Archetype…
In the Add Archetype dialog, enter the following details and select OK
- Archetype Group Id: com.hivemq
- Artifact Id: hivemq-extension-archetype
- Archetype Version: 4.6.3
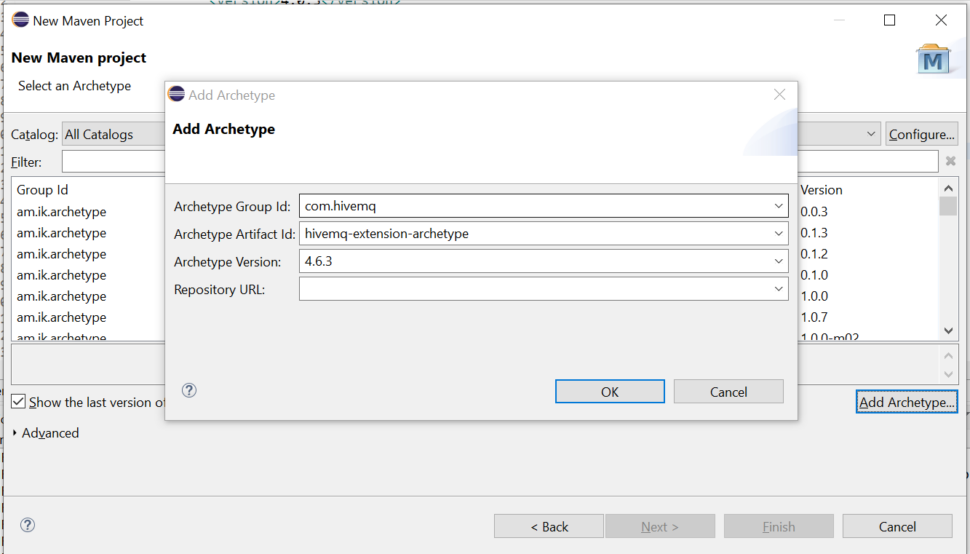
NOTE: We need to make sure while performing this step we have a stable internet connection.
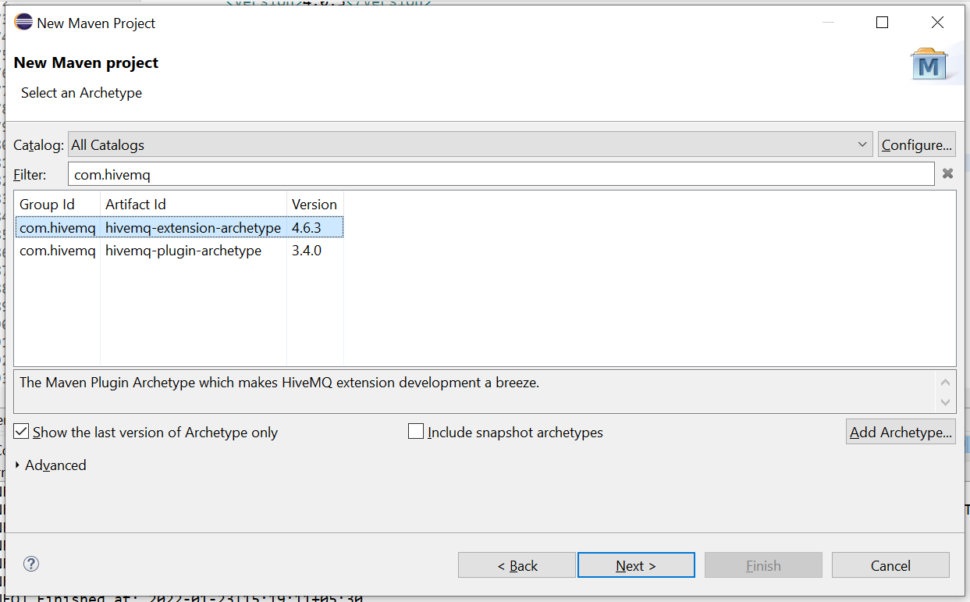
Once you select OK, it will add to the list of available archetypes
Enter Group Id, Artifact Id, and Version parameters for your custom HiveMQ extension which you want to specify. Also, add hivemqExtensionSdkVersion property with value 4.6.3 and then select Finish

Once you click on Finish, the eclipse will create an extension project with the java files below:

Now, Let’s understand what are these files and which files can we use for our extension,
HelloWorldMain.java: This is the main class of extension that can help us to perform tasks on extension start and stop.
HelloWorldListener.java: This class is responsible for each and every connection that can help us to verify all the details of the client.
HelloWorldInterceptor.java: This class is responsible for brokers to intercept all kinds of data traffic which are published by clients.
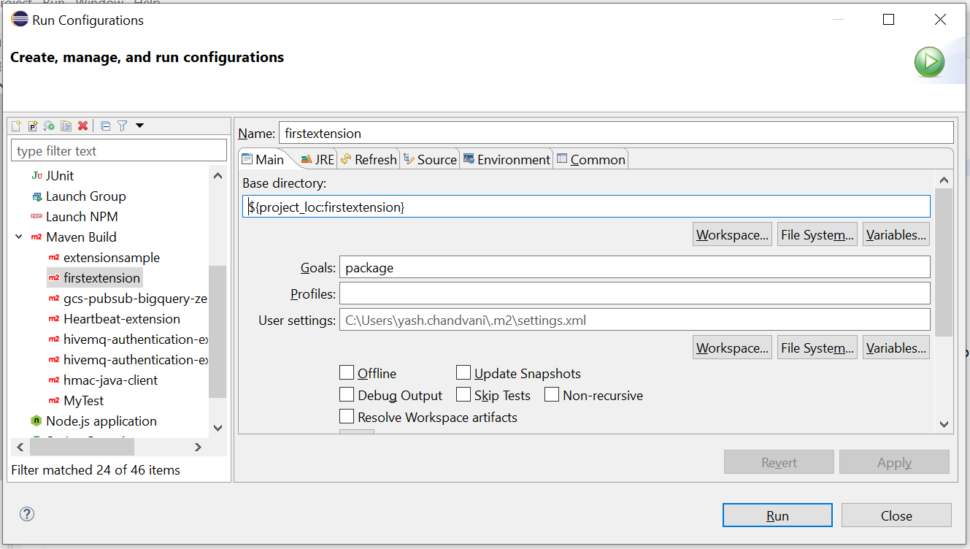
Prepare and Deploy HiveMQ extension
To generate build of extension, Select project directory and open Run Configurations > Maven Build > New launch configuration
In Goals, enter package as a goal and select Run
The output will look like this,
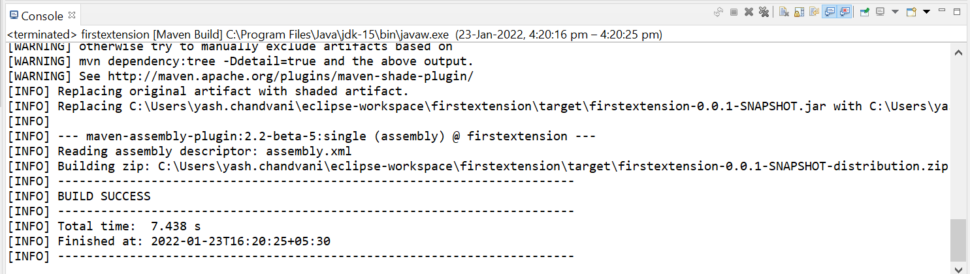
The configuration creates an <artifactId>-<version>distribution.zip
Now, extract the zip file and paste the generated folder called firstextension into the extensions folder of the HiveMQ broker. After placing the folder, restart your broker and HiveMQ will automatically detect and execute your extension. To debug please visit Debug Extension
So, In this blog, we have learned how to create a custom extension and how to deploy it. In the next blog, we will learn about custom authentication and authorization in HiveMq using extensions. Stay Tuned!