
Minio is an open-source high performance object storage server that supports all the core features of Amazon S3. It can be used to store unstructured data such as photos, videos, log files, backups and container images.
In this blog we will be focusing on setting up Minio with NGINX on Windows Server 2019.
Prerequisites
- Windows Server 2019
- NGINX Reverse proxy
- Minio Server
Installing Minio Server
Let’s start off by installing Minio Server on Windows Server. Please follow the instructions mentioned below to install Minio Server as a Windows service
- Download the latest version of Minio Server and place it in a folder ex: C:\Minio
- Download Powershell script from here and place it in the same folder as Minio Server
- Launch Powershell with Administrator privileges and navigate to the download location (Step 1)
- Execute the installation script (install-service.ps1)
- Open minio-service.xml in a text editor
- Modify the arguments tag with the following value
<arguments>server C:\minio --console-address ":9001"</arguments>- Launch command prompt with Administrator privileges and start the Minio service with the following command
sc start minio- Launch your web browser and navigate to http://localhost:9001 to access the Minio console
- At the login page, enter console credentials which are as follows
- Username : minio
- Password : minio123
Note: Minio console credentials are controlled by the MINIO_ROOT_USER and MINIO_ROOT_PASSWORD parameters present in minio-service.xml (Step 5)
- You are now logged in to the Minio console
Creating Access Keys
For any application to authenticate itself with a Minio server, it would need some access credentials. Please follow the instructions mentioned below to create an Access Key
- Login to Minio console
- Click on Access Keys option present under User section on the sidebar
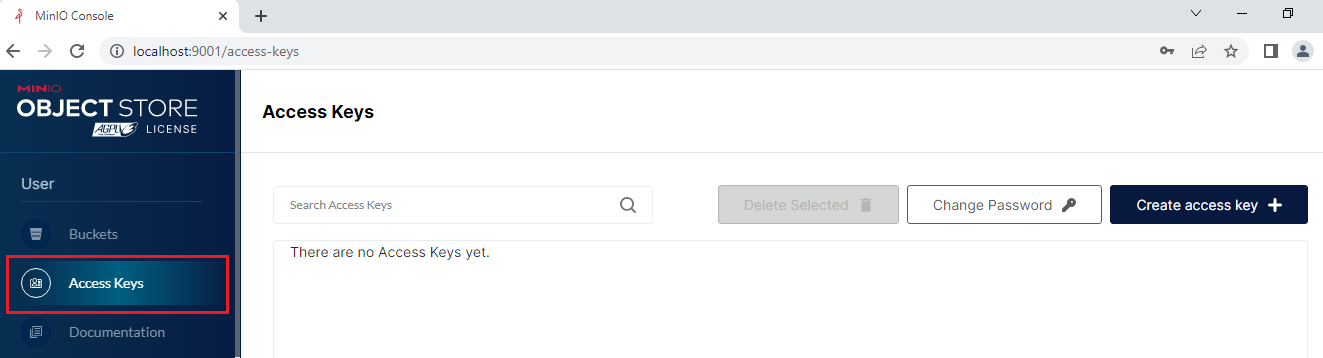
- Click on Create access key + and click on Create on the next screen
- Once an Access Key is created, the Access Key and Secret Key will be displayed
- Make a note of these credentials as they will not available to view later on
Creating Buckets
Data is stored into Buckets in Minio server similar to Amazon S3. Please follow the instructions mentioned below to create a Bucket
- Login to Minio console
- Click on Buckets option present under User section on the sidebar
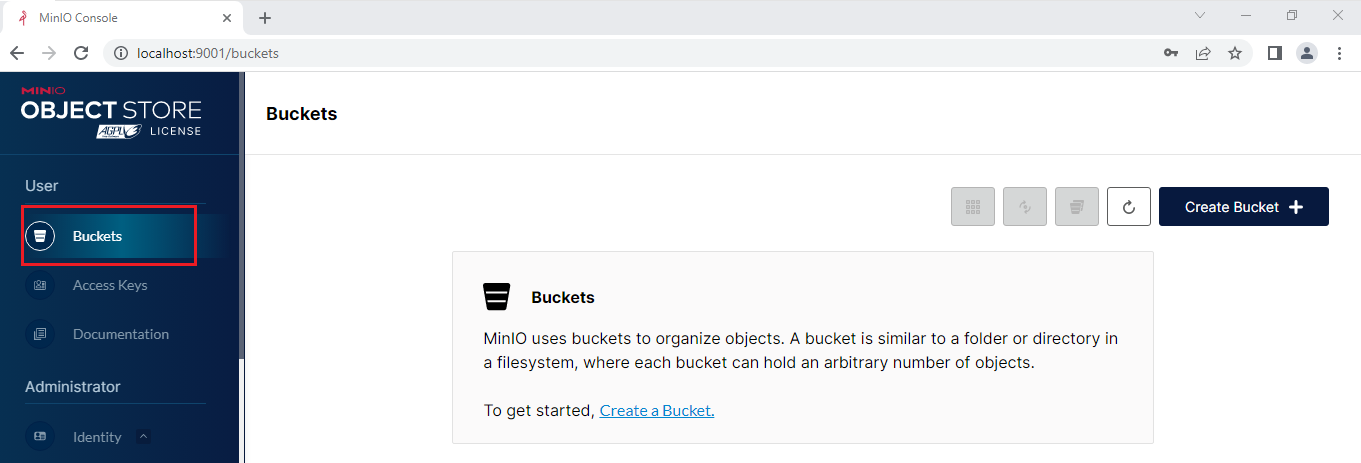
- Click on Create Bucket +
- Enter a Bucket Name and click on Create Bucket

Setting up NGINX Reverse proxy
For production environments, it is strongly recommended to place an application behind a Reverse proxy such as NGINX. It gives you great flexibility and security.
We’ll now be configuring NGINX proxy with Minio Server setup earlier. Please follow the instructions mentioned below to configure NGINX proxy
1. Download and install the latest version of NGINX
2. Add following content in the NGINX configuration file. Replace DNS, certificate file path and private key file path with actual values
server {
listen       443 ssl;
server_name  <DNS>;

ssl_certificate      <File path to certificate>;
ssl_certificate_key  <File path to private key>;

# To allow special characters in headers
ignore_invalid_headers off;

# Allow any size file to be uploaded.
client_max_body_size 0;

# To disable buffering
proxy_buffering off;

location / {
proxy_set_header X-Real-IP $remote_addr;
proxy_set_header X-Forwarded-For $proxy_add_x_forwarded_for;
proxy_set_header X-Forwarded-Proto $scheme;
proxy_set_header Host $http_host;

proxy_connect_timeout 300;
# Default is HTTP/1, keepalive is only enabled in HTTP/1.1
proxy_http_version 1.1;
proxy_set_header Connection "";
chunked_transfer_encoding off;

proxy_pass http://localhost:9000;
}
}
3. Download latest version of NSSM
4. Open command prompt with administrator privileges and navigate to the download location
5. Install NGINX Windows service by executing the following command
nssm install nginx
6. In the following pop up displayed by NSSM, set application path and click on Install service
7. Start NGINX service with following command
sc start nginx
After following all the steps mentioned above, you have now configured Minio Server with NGINX on a Windows Server running as a Windows service.